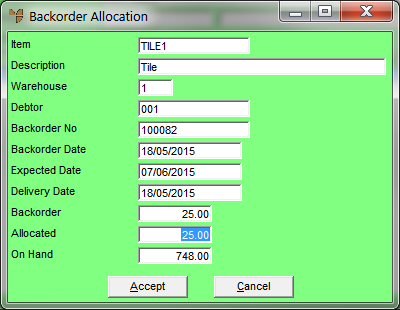
You use the Backorder Allocation screen to maintain the items included in an automatic backorder allocation batch.
Refer to "Creating a New Automatic Backorder Allocation Batch" or "Recalling an Automatic Backorder Allocation Batch".
Refer to "Maintaining the Automatic Backorder Allocation Header".
Micronet displays the Automatic Backorder Allocation screen with the list of automatic backorder allocations matching your selection criteria. The items and quantities to be ordered are displayed for your verification and so you can make any changes required.
Micronet displays the Backorder Allocation screen. The only field you can change on this screen is the Allocated field.

|
|
Field |
Value |
|
|
Item |
Micronet displays the ID of the allocated item. |
|
|
Description |
Micronet displays the description of the selected item. |
|
|
Warehouse |
Micronet displays the warehouse the item has been allocated from. |
|
|
Debtor |
Micronet displays the debtor the item has been allocated to. |
|
|
Backorder No |
Micronet displays the backorder number. |
|
|
Backorder Date |
Micronet displays the date the backorder was created. |
|
|
Expected Date |
Micronet displays the expected delivery date for the item. |
|
|
Delivery Date |
Micronet displays the actual delivery date for the item. |
|
|
Backorder |
Micronet displays the quantity of the item on backorder. |
|
|
Allocated |
Micronet displays the quantity of the item automatically allocated to the customer's backorder. You can change this quantity if required. To remove the automatic backorder allocation, change the quantity to 0. |
|
|
On Hand |
Micronet displays the free stock quantity of the item. |
Micronet saves the details you have edited and redisplays the Automatic Backorder Allocation screen.